Payments List (Basic): Filter, Search, Delete & View Info
View all your client’s payments in one spot, filter the payments list, search for a specific payment and get more details—and more.
Covered here:
- How do I know when a client has paid?
- The payments list
- Viewing payment Information & transaction IDs
- Printing a payments list
- Searching for a payment
- Filtering a payments list
- Deleting a payment (bank debits only)
- Linking payments to jobs
- Exporting a payments list
The payments list
Go to Billing > Payments from the left menu bar to get a glance at all the payments you’ve received.

To view payments for a specific account, go to Clients > Accounts from the left menu bar, select the client account, navigate to Invoices tab, then go to the Payments subtab. The Payments subtab in an account profile is available to a firm owner, admin, or any team member with access rights to manage payments.

Once you’re on the Payments page, you’ll see these column names:
- #: Each payment has a unique number.
- DATE: This is the date the payment was made.
- STATUS: The payment can be either is Paid, Verifying payment, Incomplete, or Failed status. For more, go here.
- AMOUNT: You’ll see how much the payment is for here.
- QUICKBOOKS: If you have synced TaxDome with QuickBooks Online, you’ll see the payment sync status here.
- Synced: the payment is successfully synced.
- Not synced: the payment is not synced. The paid service could have been created before sync with QuickBooks Online.
- Syncing: the payment is being synced. This process takes time.
- Failed: a sync error has occurred. Hover your mouse over the status icon to see the error text, then fix it.
- Skipped: you skipped sync for this payment.
- SOURCE: How payment was made. For example, if a client paid online with a card, you’ll see Credit Card.
- CLIENT: The name of the account: Click on it to go to the account.
- INVOICES PAID: The number of the paid invoice: Click on it to view the details.
- REFUND: If a payment has been refunded, the amount given back.
- DESCRIPTION: Payment details. With offline payments, you can see who added the payment.
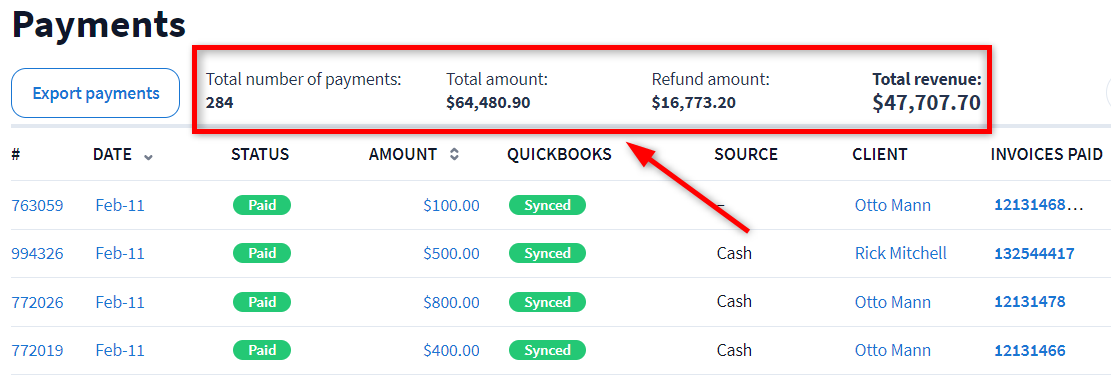
At the top of the Payments page, you will see totals for payments recalculated when the list is filtered:
- The total number of payments (includes payments with linked invoices, pre-payments, payments without invoices and failed payments)
- The total amount paid (includes only payments with linked invoices and failed payments)
- The total refund amount
- The total revenue (total amount minus refund amount).
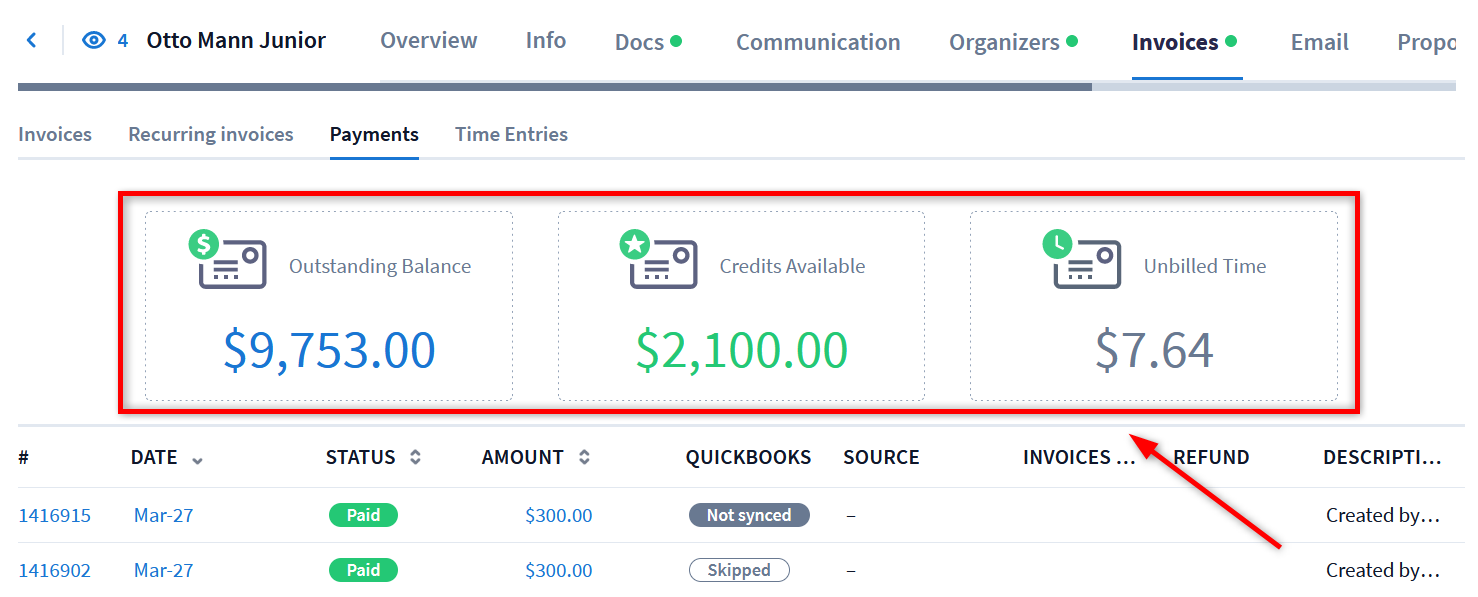
When viewing a specific client’s payments page, you see the dollar amount for their outstanding invoices, their available credits and unbilled time.
Viewing payment information & transaction ID
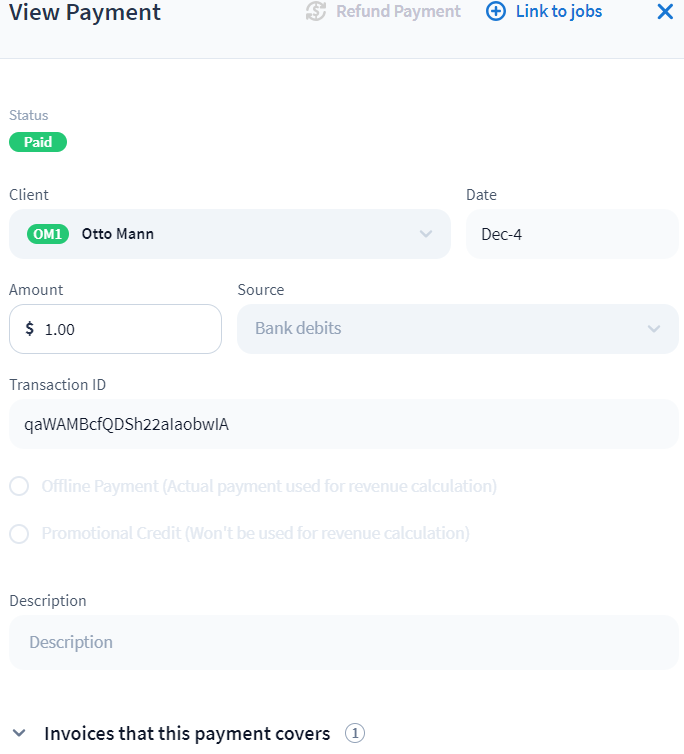
To view the payment details, click on its number, date, status, amount or on the three dots to the right of it (or the eye icon, if any) and select View.

You can find out the payment type, amount, and the invoices a payment covers. If payment was made through Stripe or CPA Charge, its transaction ID is displayed.
Printing a payments list
To print a payments list, click the Print button at the top right of the page.

By default, the payments list displays 25 payments per page. If you want to print more, select the number in the Rows per page menu at the bottom left of the page.

Your browser will offer you to print the list and include the current date and time.
Searching for a payment
To search for a payment by description, amount, client account or an invoice number, type a keyword in the search field, then hit return on your keyboard. Click the x in the search field to clear it.
Filtering a list of payments
Use filters to view a certain type of payment. For example, filtering allows you to quickly view all payments made in a specific year. There are three ways to filter payments:
-
By account: See only payments from a selected client account.
-
By time frame: See only payments made during a specific year.
-
By source: See only payments made by credit card or added manually.
To narrow a list of payments, click Filter in the top right corner, select the filters, then click Apply. The chosen filters remain the same when you leave and reopen the page. Find out more about filters here.

Deleting a payment (bank debits only)
As a rule, we don’t recommend deleting payments. After a payment has posted, it should remain the same for your record-keeping. However, sometimes the Bank debits transactions can fail up to 60 days after they’ve actually been authorized.
If the transaction was declined by Stripe or CPACharge, you can delete the corresponding payment on TaxDome. But in all other cases, issue a refund rather than delete a payment. For more information, go here.
To delete a declined Bank debits payment, click the three dots to the right of the payment in the list, select Delete, then confirm.

Here's what happens when the payment is deleted:
- The status of the corresponding invoice changes from Paid to Unpaid or Overdue.
- The synced payment in QuickBooks is deleted.
Linking payments to jobs
Link payments to jobs to make them immediately available in your workflow. A firm owner, admin or any team member who has been given access rights to manage payments can link payments to jobs.
There are three ways to link a payment:
- From the offline payment creation screen: Click Link to Jobs in the top right, then select the jobs. Once linked, the Jobs section is displayed. You’ll see the job’s title and the pipeline the job belongs to.

- From the payments list: Click the eye icon to the far right of the payment, select Link to Jobs, then select the jobs from the list. Once linked, the Jobs section is displayed. You can see the job’s title and the pipeline the job belongs to.
- From pipeline: Make sure that the job is in the right stage, click the job box, click + Link on the top right, select Payment, then choose the payments. You can link any payment previously made by a client. A job can have as many linked payments as needed. Once payments are linked, you’ll see them in the Payments section of the expanded job box. Click the x to unlink payments.
After linking, payments will be displayed in the Payments section of the job card. Clicking the eye icon will open the payment in an additional sidebar.
